
How to Use Saved Maps
Saved Maps makes it easy to organize, customize, and share your property research with anyone.
Whether you're working with a buyer, surveyor, developer, or simply saving a project for later, you can create interactive maps complete with overlays, measurements, drawings, georeferenced files, branding, and attached documents.
Best of all, anyone you share a Saved Map with can view and interact with it, even if they don't have a Land Portal account.
Step by step walkthrough
- Login to Land Portal
- Open a Property and Create a Saved Map
Search for and open the property you'd like to save.
In the upper-right corner of the map, click Save.
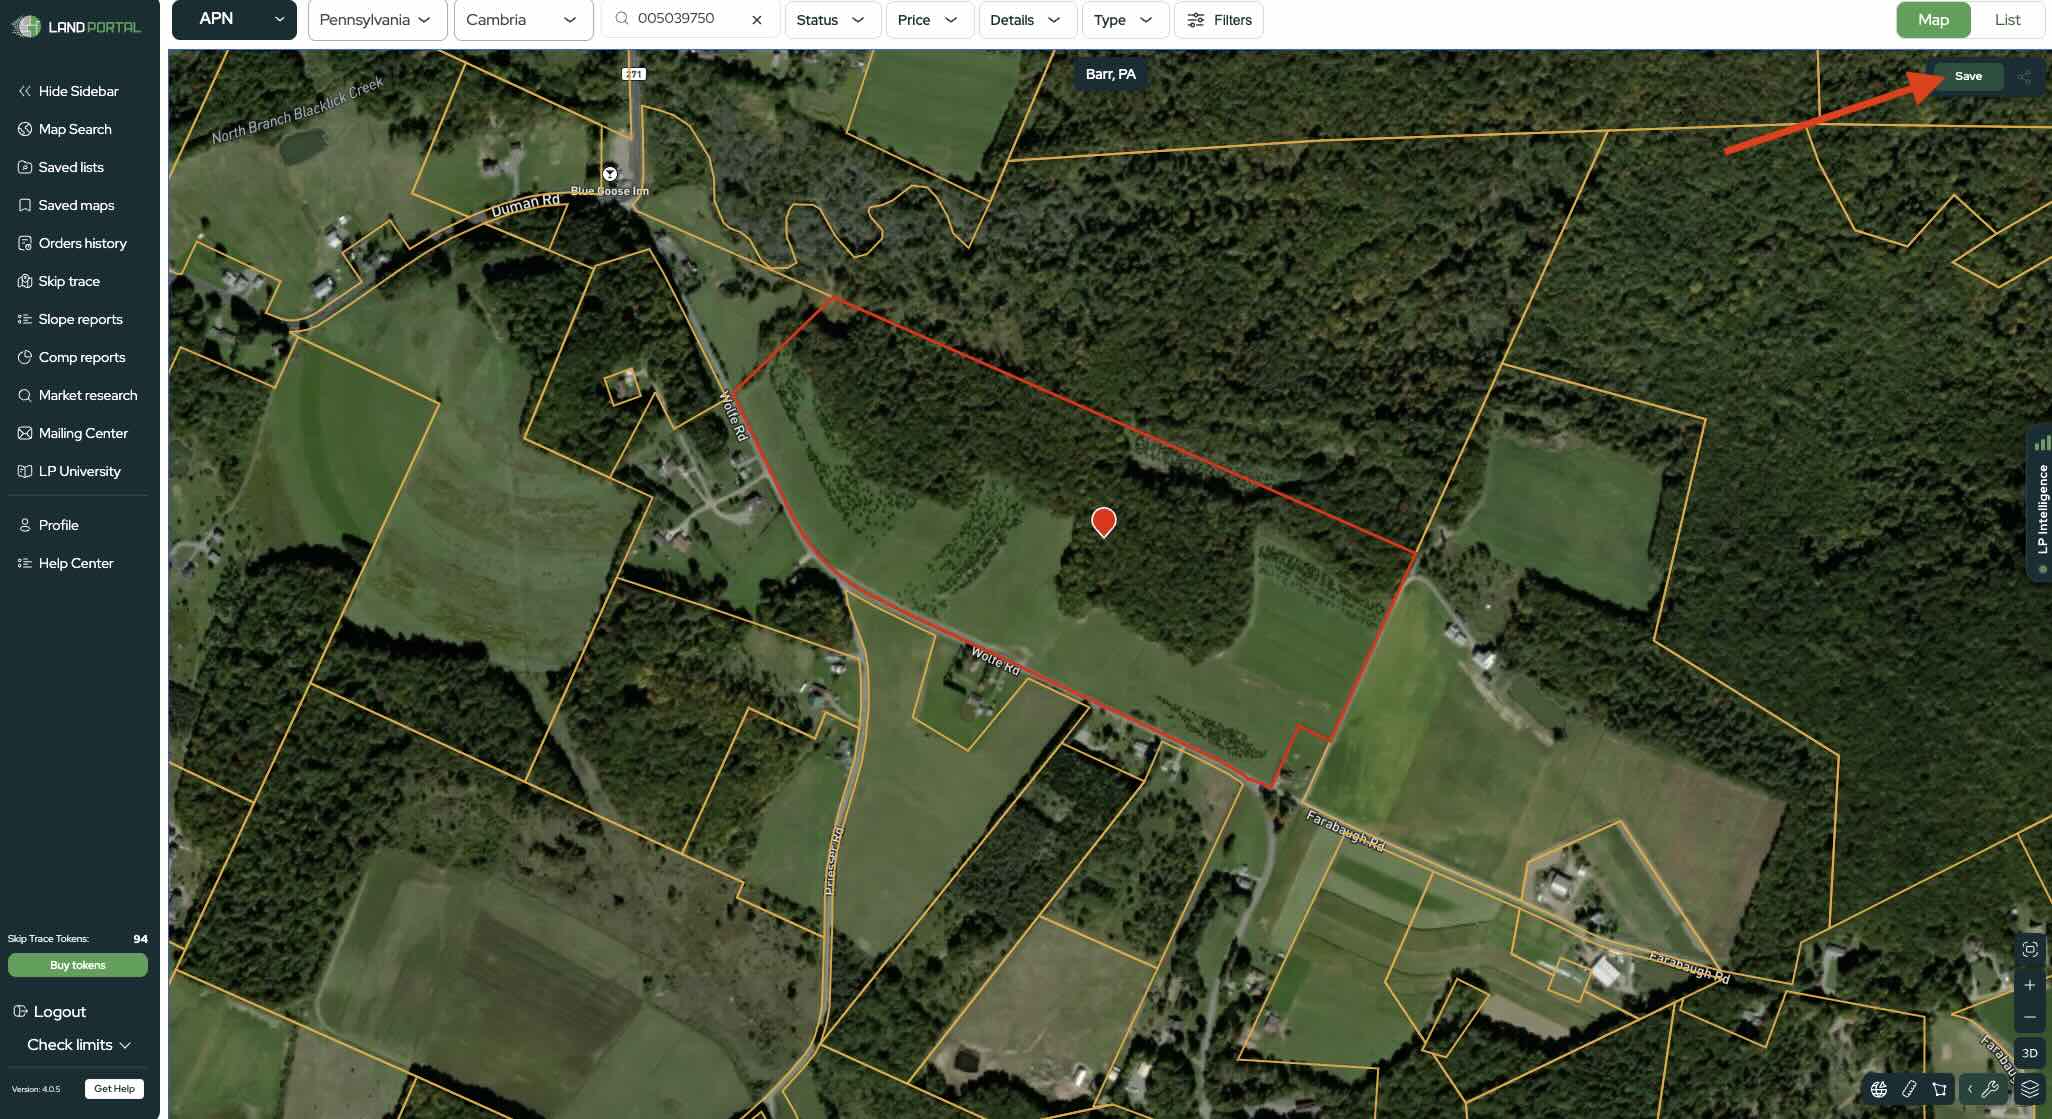
Give your map a name, and click Create.
This creates a Saved Map that you can edit, organize, and share at any time.
- Customize Your Saved Map
After creating your map, you can personalize it with information that's useful for your project or the person you're sharing it with.
Options include:
- Add your name, phone number, and company logo.
- Attach files such as surveys, photos, or other documents.
- Add Photo Galleries to display location-specific images directly on the map.
- Use Image Overlay to position site plans, drawings, or other images over a property.
- Enable map overlays like Contour Lines, Soil Types, or Flood Plains.
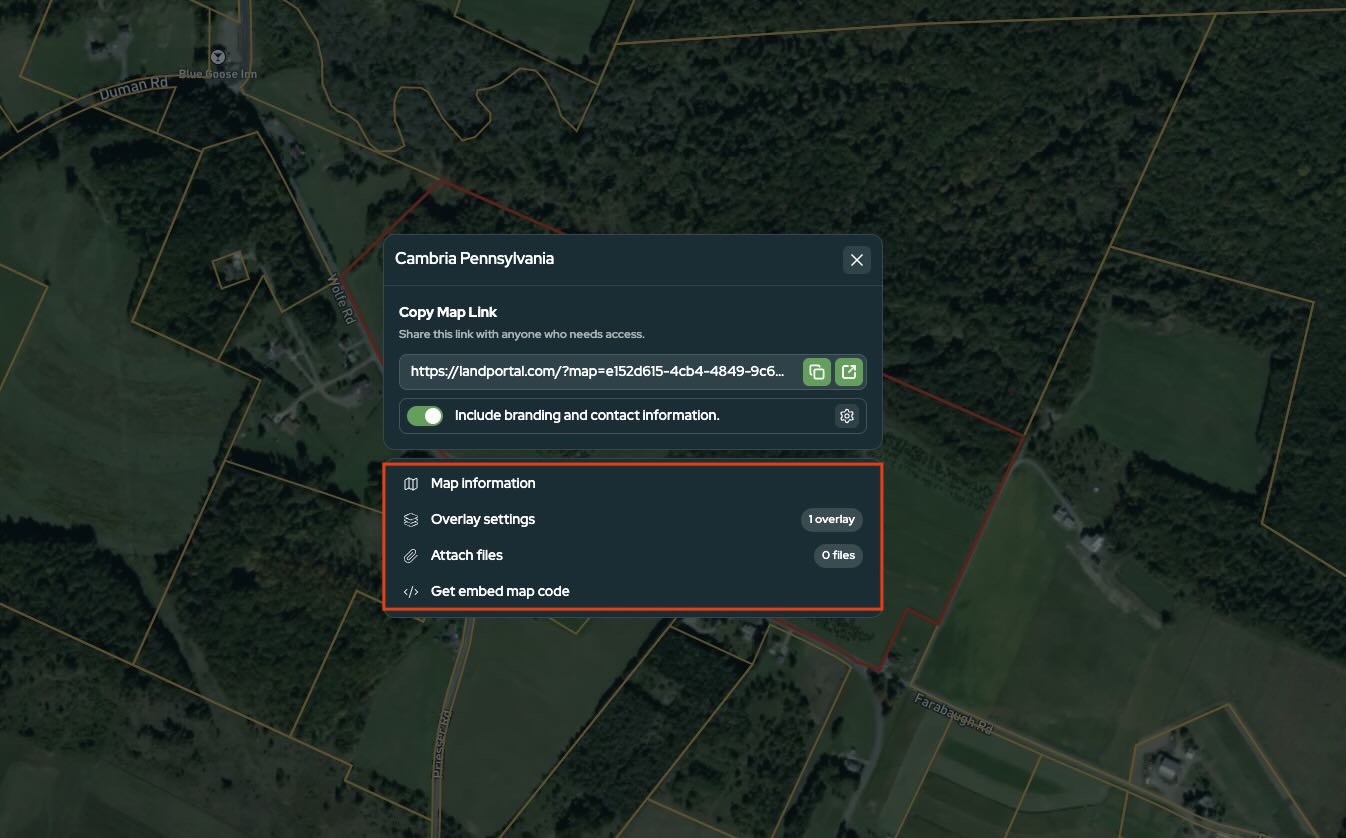
These details help provide additional context and create a more professional experience for anyone viewing the map.
- Share Your Map
Click Share to copy your Saved Map link.
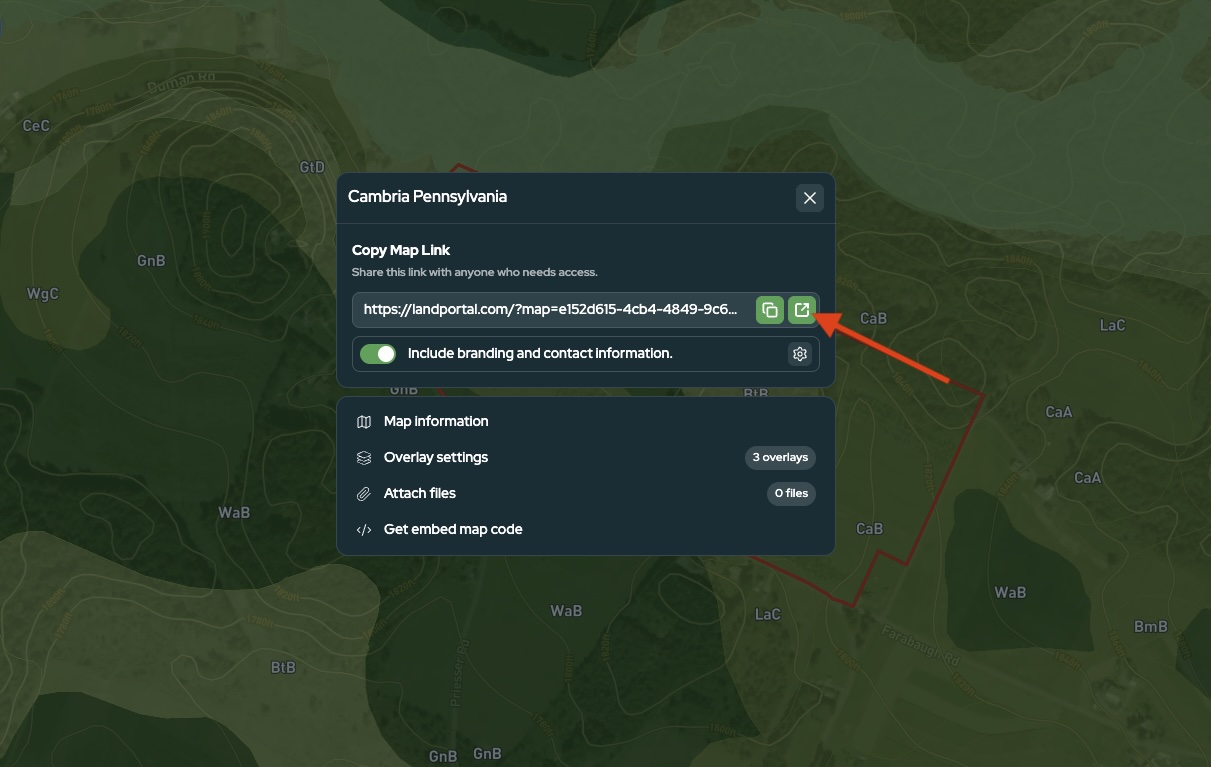
Anyone with the link can open the interactive map in their web browser, even without logging into Land Portal. They'll be able to:
- View your branding and contact information.
- Explore available property details.
- Turn available map overlays on or off.
- View Street View where available.
- Explore shared map content, including drawings, image overlays, photo galleries, and GIS layers.
- Interact with the map directly from their browser.
This makes Saved Maps an excellent tool for sharing properties with buyers, surveyors, developers, contractors, or other team members.
- Add Drawings, Measurements, and Georeferenced Content
Saved Maps can also be used to plan projects and add detailed information directly to the map.
In the bottom-right corner, click the wrench icon to open the tool cluster. You'll see three tools:
- Georeference: Import GIS files, add Image Overlays, and create Photo Galleries with location-specific images.
- Measurement: Measure distances, property boundaries, and other areas of interest.
- Polygon Drawing: Draw custom shapes, mark important areas, or outline potential subdivision layouts.
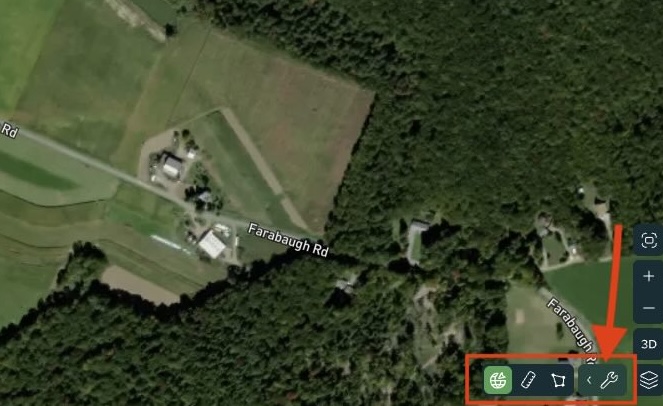
The Georeference Tools allow you to import GIS files such as GeoJSON, KML/KMZ, GPX, GPKG, and zipped Shapefiles. You can also position, resize, and rotate Image Overlays to align site plans or other images with the property.
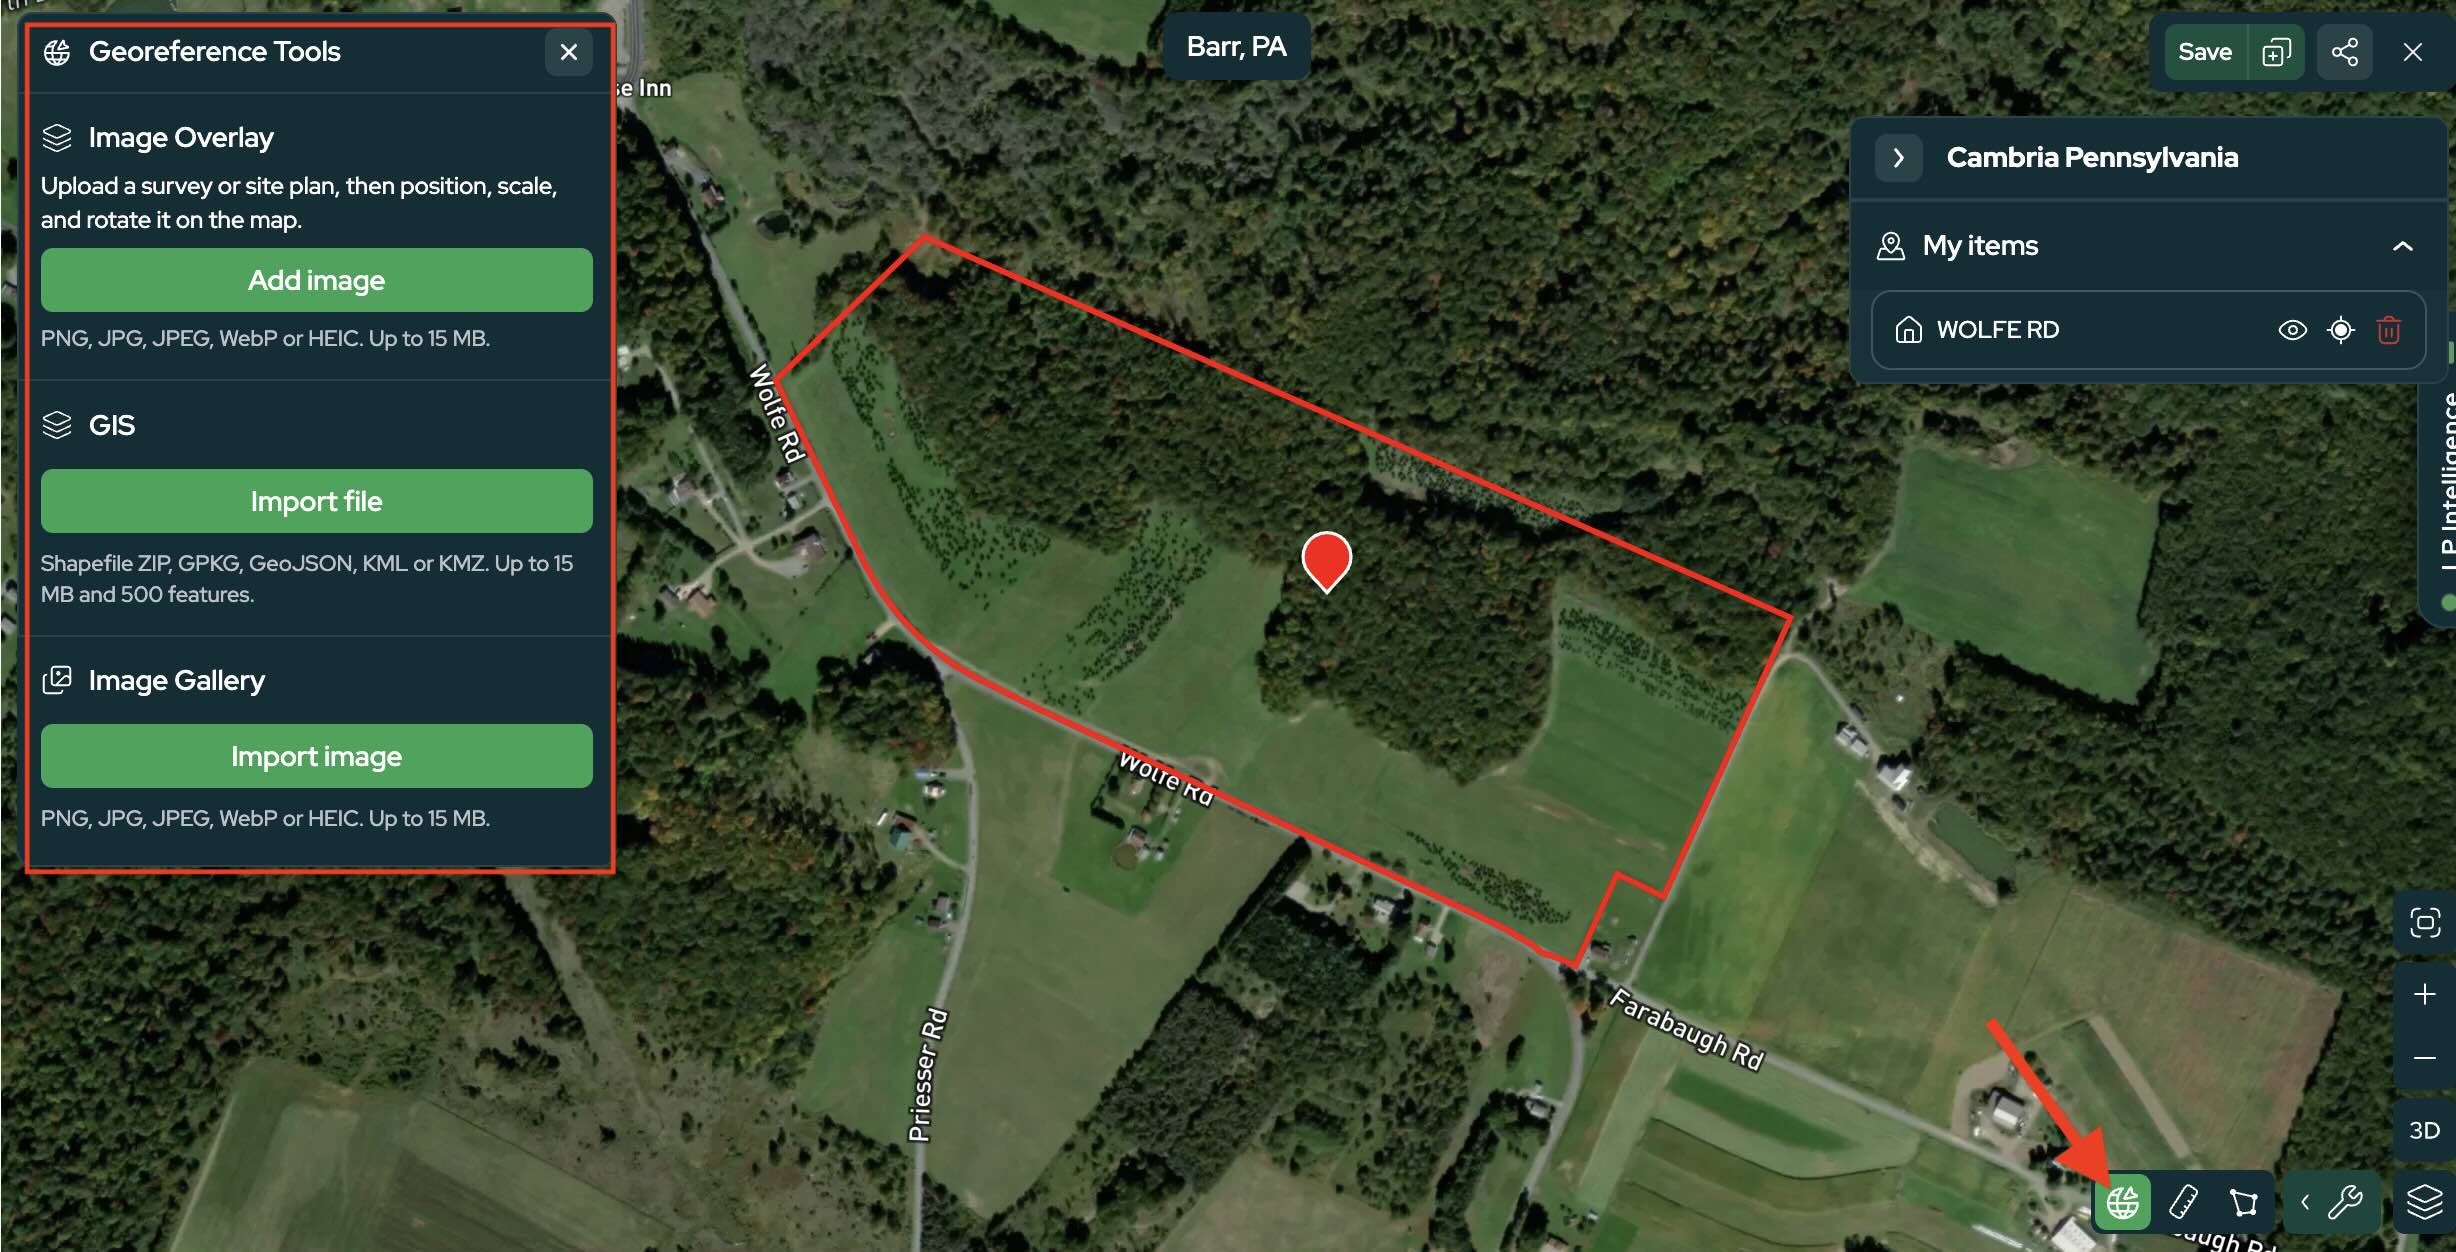
Use the My Items panel to organize your map content and adjust the order of layers using drag and drop.
For more detailed instructions on measuring and drawing, check out our article: How to Use the Drawing & Measurement Tools.
Any updates you make to your Saved Map are automatically reflected using the same shared link, so you don't need to generate a new URL each time you make changes.
- Manage Your Saved Maps
To access all of your Saved Maps, open the Saved Maps section from the left navigation menu.
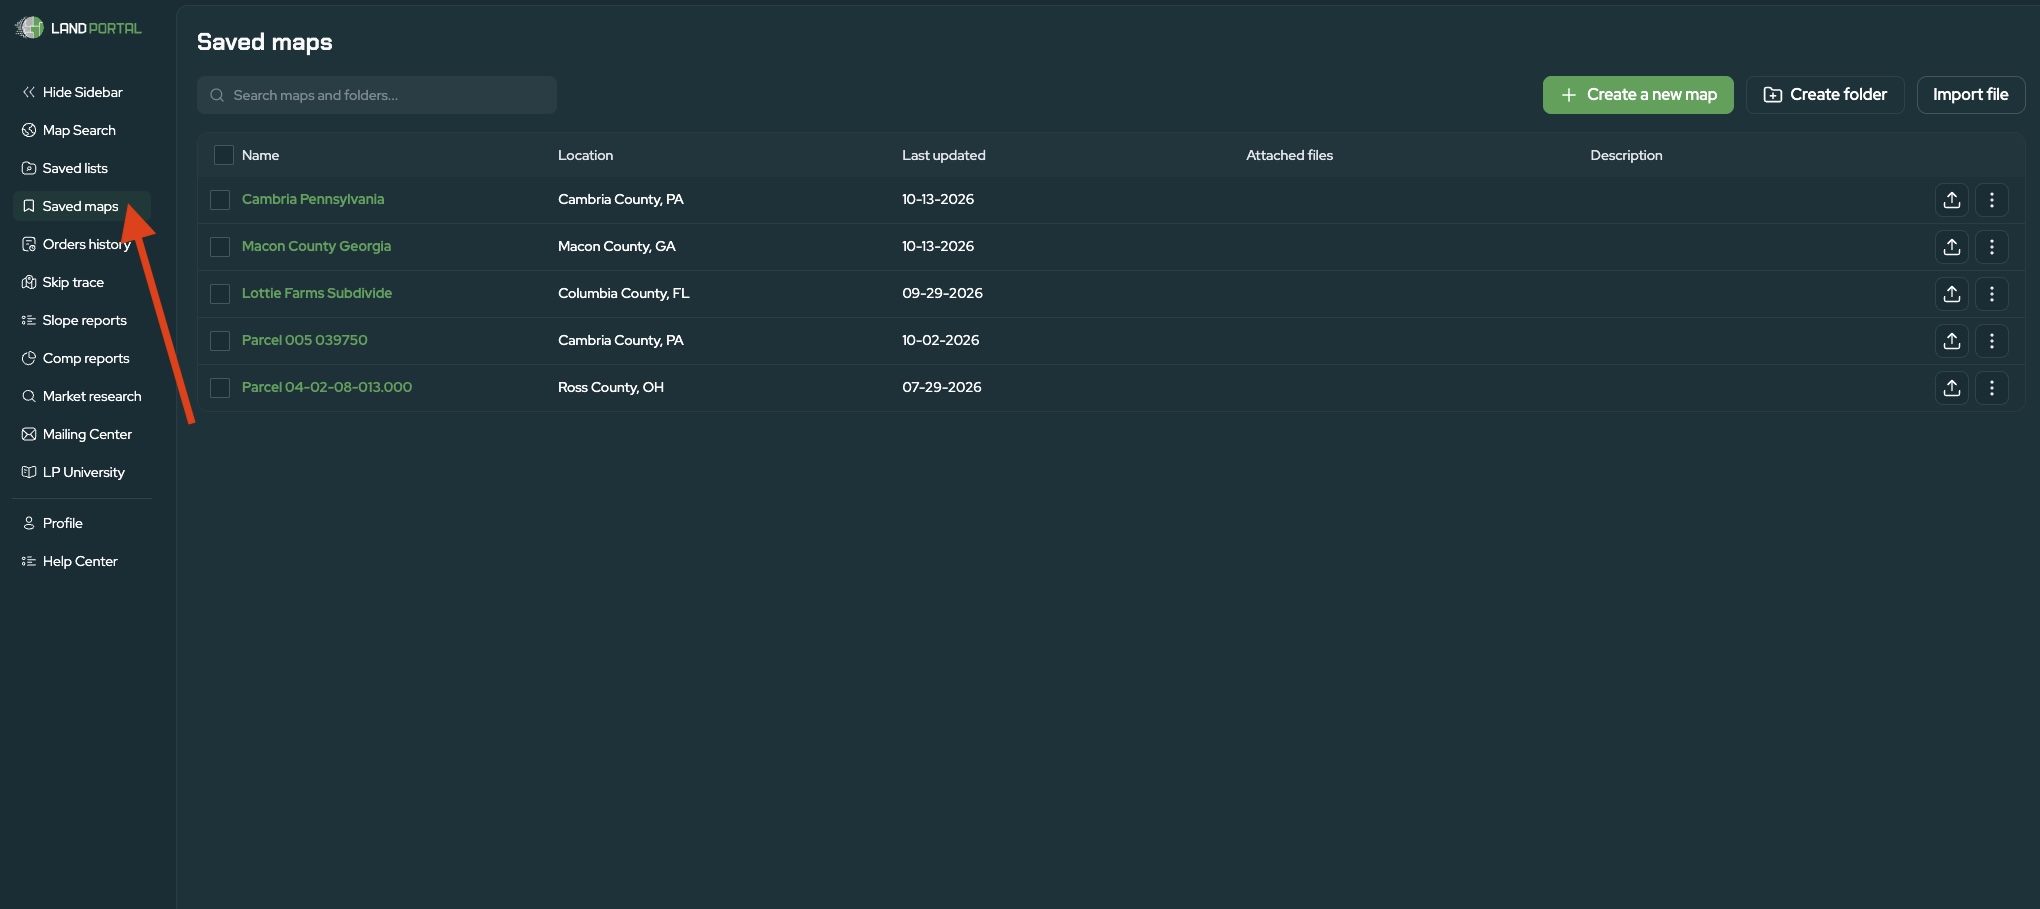
From here you can:
- Open previously saved maps.
- Rename maps and edit descriptions.
- Attach additional files.
- Organize maps into folders.
- Share maps.
- Delete maps you no longer need.
Why Use Saved Maps?
Saved Maps gives you a simple way to organize property research, collaborate with others, and present land professionally.
Instead of sending screenshots or rebuilding your work, you can share a single interactive map that includes property details, custom drawings, measurements, GIS data, and project images.
Ready to streamline the way you research and share properties? Create your first Saved Map in Land Portal and start collaborating with buyers, surveyors, developers, and your team today.