How to Create a Handwritten Mail Campaign in Land Portal
Direct mail is still one of the most powerful ways to reach landowners and buyers, especially when you’re working in rural markets or targeting specific property types.
Land Portal’s built-in mailhouse lets you turn any list of properties into a handwritten, highly personalized mailing campaign without leaving the platform.
You can start from a property list, a saved search, a CSV file, or even a single property card, then customize your letter, envelope, and merge fields so every owner receives a tailored message.
In this walkthrough, we’ll go step by step through placing a mail order using the Mailing Center, from choosing your template to scheduling and tracking your campaigns.
Step by step walkthrough
- Start your mailing from a property list
- Go to your List View in Land Portal.
- Build or open the list of properties you want to mail (for example, a list of 279 properties in a county).
- At the bottom left of the list view, click Start Mailing.
💡 You can also do this from a Saved Search, a CSV upload, or a single property card and we’ll cover those options at the end.

When you click Start Mailing, Land Portal saves that list to your Mailing Center so you can come back to it later.
- Choose your mailing template or add a design
After you click Start Mailing, you’ll be prompted to choose a template.
You’ll see several built-in options, such as:
- I’d like to buy your land
- Nearby land for sale
- Interested in selling your land
- Blind offer

For this example, select Interested in selling your land and click Continue.
If you prefer to start from scratch, you can click Add Design to create your own custom template. This opens a blank layout that you can fully design.

- Clean and verify your mailing list
Before you design the letter, Land Portal helps you clean your list so you’re only mailing good addresses.
Remove duplicates
- Click the option to remove duplicates.
- The system will remove duplicate records (for example, reducing a 279-record list by ~30 if there are repeats).
- USPS address scrub
- Land Portal runs a USPS address verification.
-
Any addresses that cannot be verified with USPS are excluded from the mailing so you’re not wasting postage.
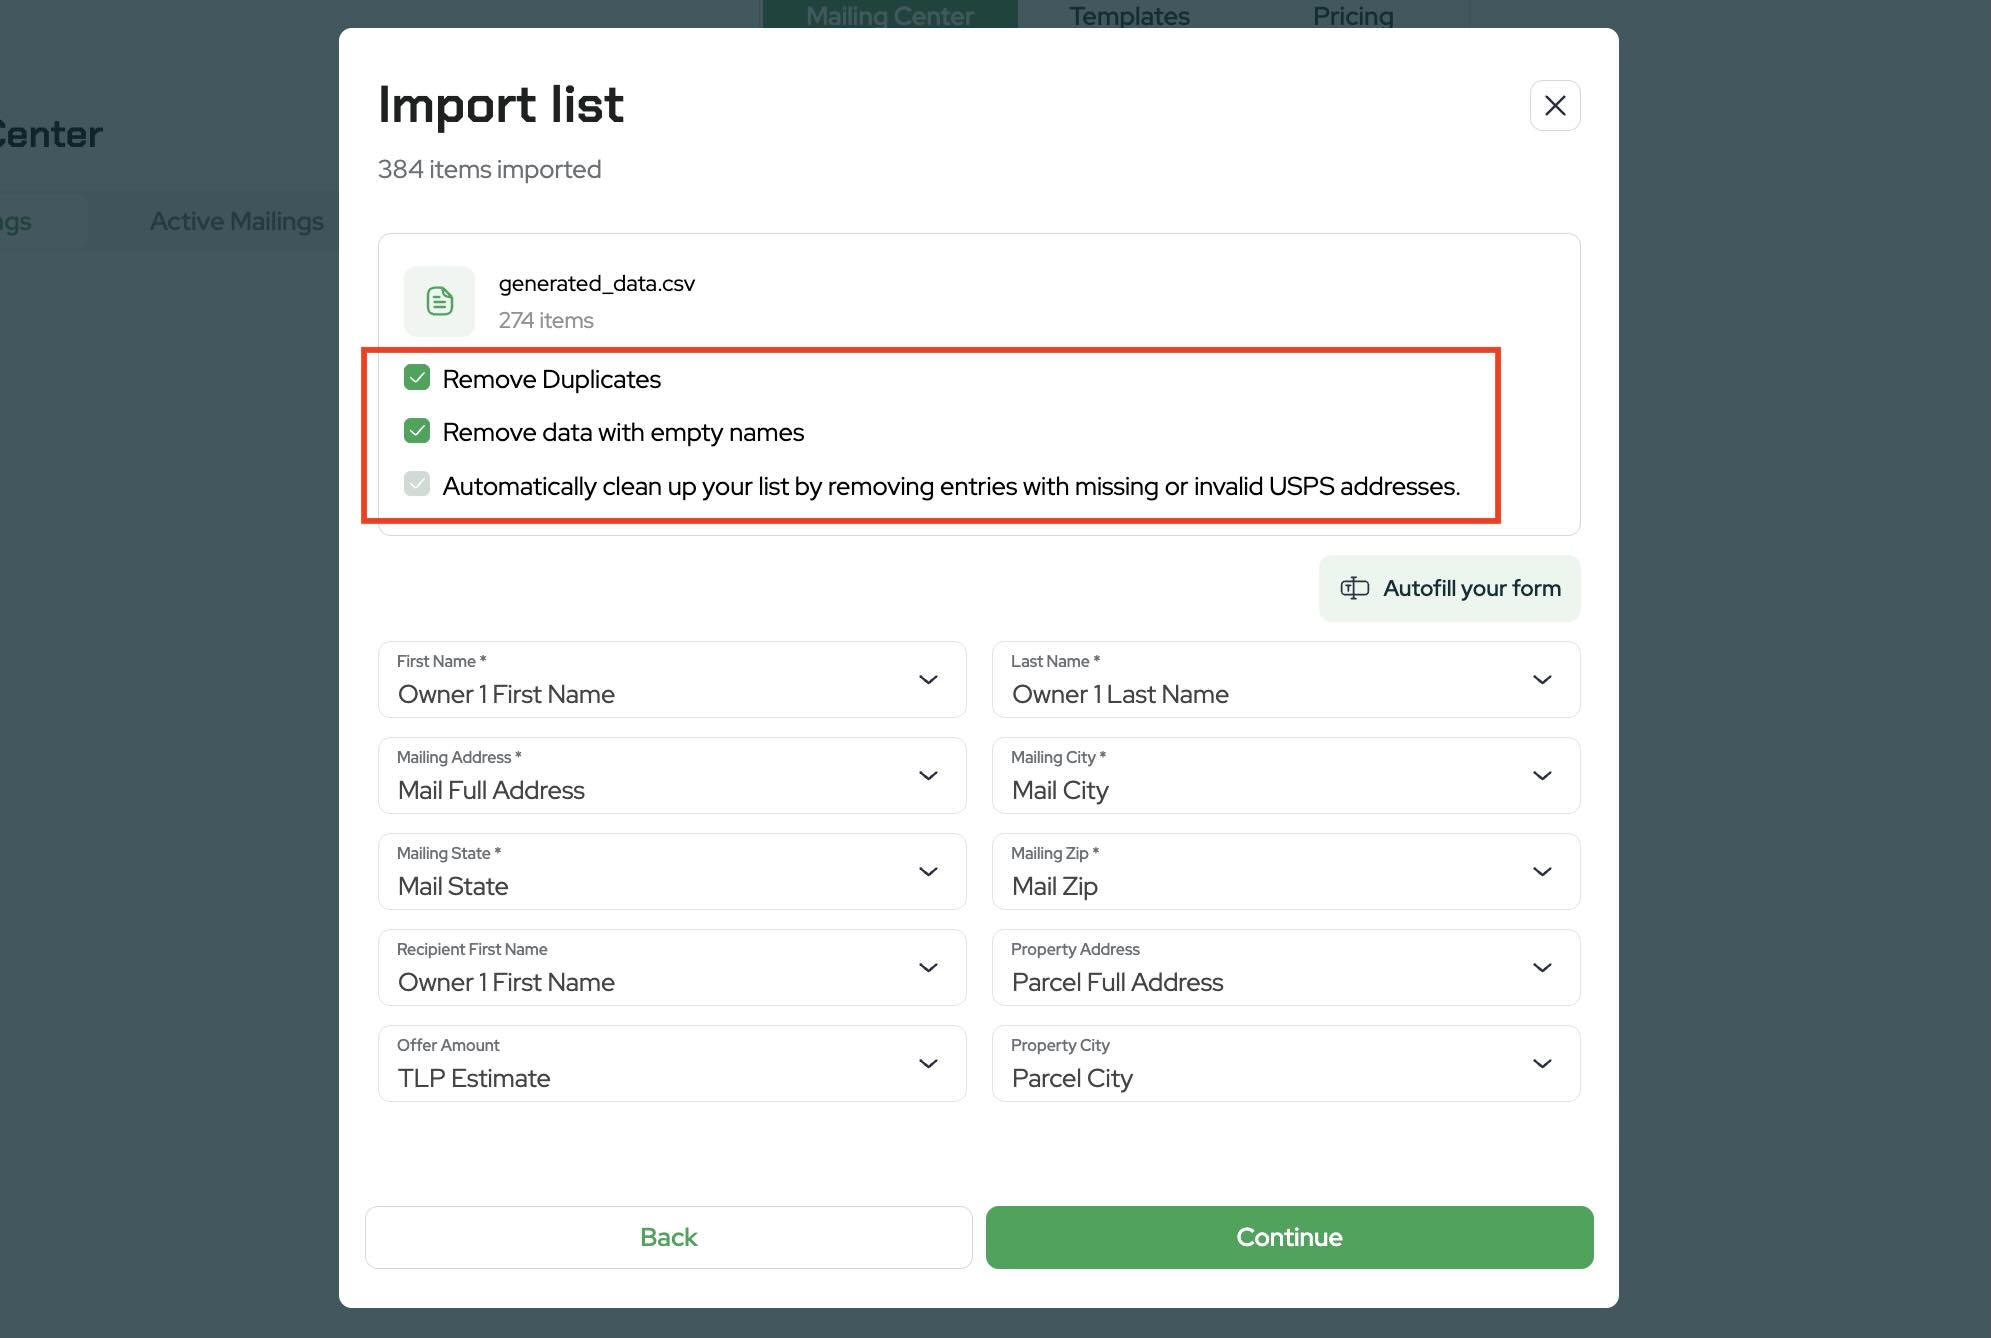

Autofill mailing fields
- Click Autofill your form to automatically fill in fields like mailing address, city, state, ZIP, etc.
-
Review the fields and scroll your list to make sure everything looks correct.
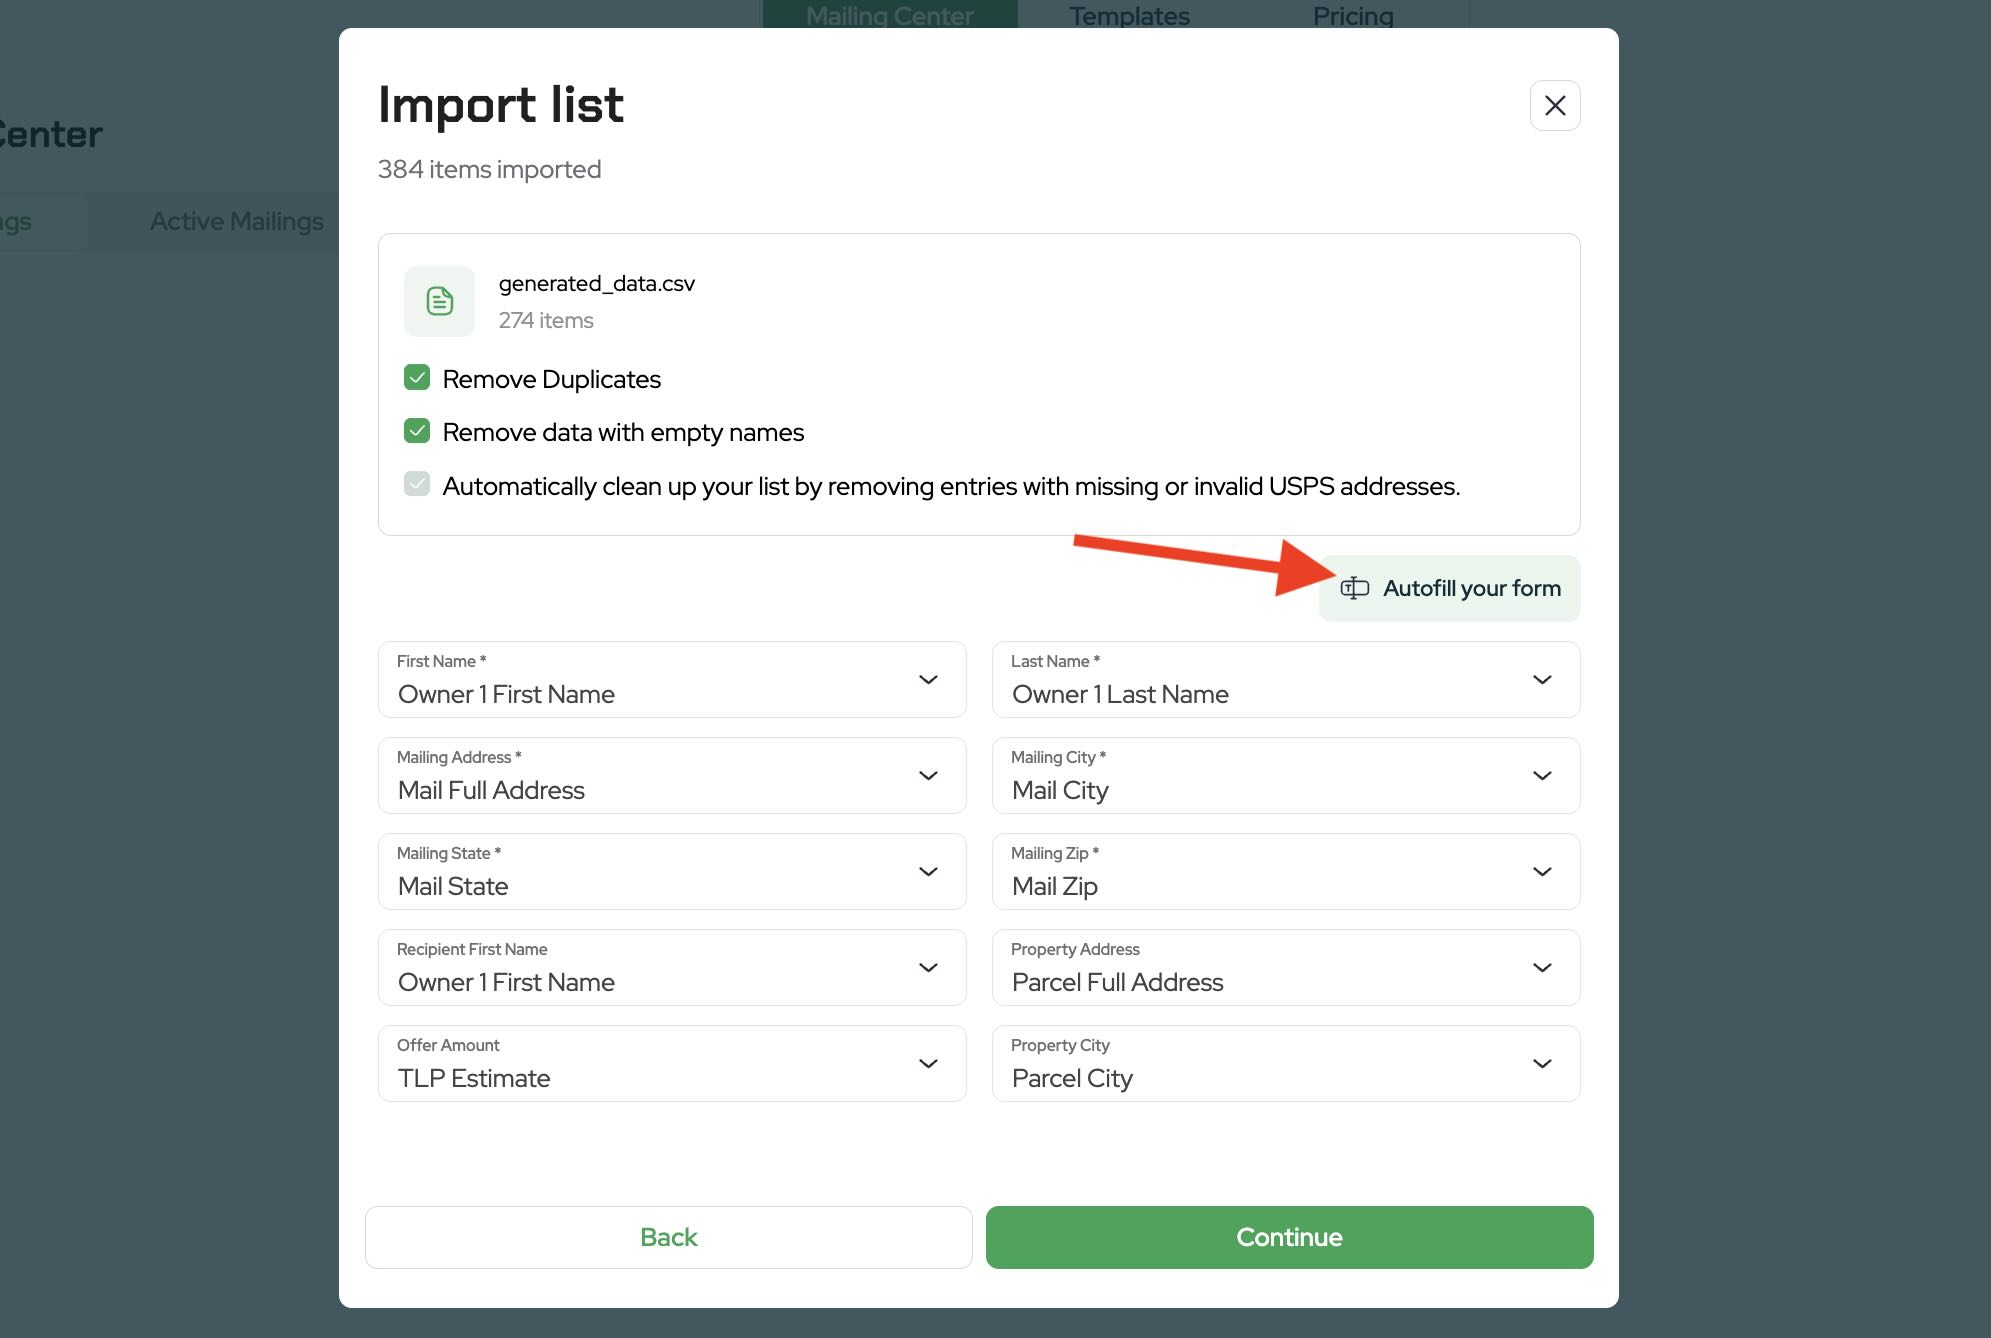

Once everything looks good, click Continue.
- Understand the template editor layout
Next, you’ll see the template editor. This is where you customize how your handwritten letters and envelopes will look; logo, website, font, QR codes, etc.
You’ll have tabs for:
- Front side – The front of the letter
- Back side – The back of the letter
- Inside – The main letter content
- Envelope – Your return address and recipient address layout
- Merge fields – All of the dynamic fields you can insert (owner name, property address, county, offer price, etc.)
These letters are authentically handwritten using a pen and designed to look like real handwriting, not printed fonts.

- Customize the front side (logo, colors, contact info)
On the Front side tab:
Upload your logo
- Click the image area to upload an image (your logo or branding).

Change the background color & text color to match your branding.

- Add contact info; name, phone number, email, and website to the bottom of the letter.
This makes it easy for sellers to contact you.

When you’re happy with the design, move to the next tab.
- Add a QR code to the back side
On the Back side tab:
- Enter the URL you want the QR code to point to (e.g., your website or a lead capture page).
- Enable the QR code option.
- Click Add QR Code to place it on the back of the letter.

This makes it easy for recipients to scan the code with their phone and go directly to your site or a landing page tailored to the campaign.
- Edit the inside letter text and fonts
On the Inside tab:
- Choose a handwritten font that fits your brand and tone.
- Read through the pre-written letter text (if you used a template).
- Edit the copy to match your voice and offer.
You can:
- Change the introduction.
- Adjust how you reference the property (address, county, etc.).
- Add or remove details about your buying criteria or process.

- Insert and manage merge fields
Merge fields personalize each letter using the data in your list.
From the Inside tab and the Merge fields options:
Insert standard merge fields:
- Click Insert merge field where you want dynamic data (e.g.,
{Owner name},{Property address},{Property city},{Property state},{APN}, etc.).

- Create custom merge fields
- If you have additional columns in your data (for example, Mail County, Offer Price, TP Estimator), you can create custom merge fields that map to those columns.
- Click to create a new merge field, choose the column you want (e.g., “Mail County”), and insert it into your letter text.

- Review and adjust merge fields
- Use the Merge Fields tab to see all available fields and confirm they’re mapped correctly.
- You can swap out fields if something is misaligned (for example, changing from
{Property address}to{Mail county}).

Always insert new merge fields from the Inside tab using Insert merge field so they remain connected to your data.
- Set your sender and envelope details
On the Envelope tab:
- Enter your name and return address (name, street, city, state, ZIP).
- Confirm how the recipient address is displayed, based on the mailing address fields from your list.

You’ll also see the mail class options, such as:
- First Class Mail
- USPS Marketing Mail (Standard)
Pricing is shown per letter inside the app, and this may vary over time, always refer to what you see in the top corner of the screen for current rates.

- Preview your letter and save as a draft (optional)
Before sending:
- Click Preview to see exactly how the letter, envelope, and QR code will appear.
- Scan the QR code with your phone to make sure it goes to the correct URL.

- If you’re not ready to send, click Save mail as draft.
Saved drafts can be found under Draft Mailings. You can:
- Open a draft later
- Make changes
- Continue the mailing flow from where you left off

Your design is also saved as a template you can reuse for future campaigns.
- Schedule or send your mailing
When everything looks good, click Continue to move to the scheduling screen.
Choose whether to:
- Send now – Mail goes out as soon as it’s processed, or
- Schedule – Pick one or more future dates.

A common strategy is to schedule smaller batches of mail over several weeks (for example, mailings on the 12th, 19th, and 26th) so responses don’t all hit you at once.
After selecting your option, proceed to the payment step and confirm your order.
- Track your mailings
Once your mailings are submitted, go to the Active Mailings section.
Here you’ll see:
-
Each campaign you’ve sent
Status updates as mail moves through:
- Submitted
- Processing
- In production
- Sent
- Activity and basic statistics for your mailings
This gives you a clear view of what’s going out and when.

- Other ways to start a mailing
In addition to starting from a list view, you can also:
From a CSV file (Mailing Center tab)
- Go to the Mailing Center tab.
- Click Start Mailing.
- Upload your CSV file (for example, a county list you’ve scrubbed externally).
- Choose your template or add a design, then follow the same process as above.

From a Saved Search
- Go to the Saved Search tab.
- Find the search you want to use.
- Click Start Mailing (typically top right).
- You’ll be taken into the same mailing flow.

From a single property card
- Open the map, zoom in, and click on a property.
- In the property card, click Start Mailing (top left).
- This creates a one-off handwritten letter to that specific owner using the same editor and workflow.

Handwritten mail that’s tightly integrated with your property data is a powerful way to generate leads, negotiate deals, and sell land faster.
With Land Portal’s Mailing Center, you can build lists, personalize every letter with merge fields, schedule campaigns, and track your results, all in one place.
To get started, log in to Land Portal, open your property list or head to the Mailing Center, and click Start Mailing to launch your first handwritten campaign today.